
Hexen: Beyond Heretic (1995) | HEXEN.WAD
Raven Software
People tend to have a certain idea of what doomer shooters are supposed to be like. What that idea is has changed over the years -- Doom, for all the attention on its violence and heavy metal soundtrack, was the purest form of what John Romero was talking about whenever he said "design is law," and most of its imitators -- even the bad ones -- followed suit with maze-like levels inspired by Dungeons & Dragons and an attempt at giving players a sense of adventure. Serious Sam and Painkiller represented a shift, focusing instead on combat and moving more towards an arena structure; these days, many doomer shooters -- and, indeed, many Doom maps being made today -- are tightly designed racecourses where "flow" is God, their designers preoccupied with, essentially, an arcade-style progression where you're never not moving and combat hits a certain regular tempo. While there is a place for this kind of gameplay, I personally get bored of it easily, and so I always find myself going back to the likes of Duke Nukem 3D (Duke3D maps, even new ones, rarely have this problem,) Eternal Doom, for all its weirdness, and, naturally, Hexen.

Hexen: Beyond Heretic is, as the subtitle suggests, Raven Software's big sequel to Heretic. But unlike Doom II: Hell on Earth, which was basically More And Bigger Doom, Hexen represents a major change in gameplay compared to Heretic, which was pretty much just Doom with a fantasy reskin. Well before the likes of Half-Life or even Quake II, Hexen was one of the earliest shooters to use scripting to add some dynamism and non-linearity to its design and structure. It's fairly primitive, and the overall execution is mostly a series of opaque switch puzzles, but it's there. Between this, the addition of jumping (!) and the introduction of polyobjects to simulate things like swinging doors and moving walls and the overall result is something like a particularly violent dungeon crawler, all lovingly rendered in idTech 1, but without the RPG trappings we'd expect, like earning experience and gear progression.
Despite major changes in gameplay, Hexen remains a sequel to Heretic, aesthetically, thematically and plot-wise. The action moves from the realm of Parthoris to Cronos, another medieval fantasy world, this one populated entirely by humans and currently under the thrall of Korax, the second of the Serpent Riders, who has corrupted the leaders of the three factions that govern society: the armies of the Legion, the scholars of the Arcanum, and the faithful of the Church. In reflection of this, you have a selection of heroes, modeled off of standard fantasy player classes: Baratus the fighter, Daedolon the mage, and Parias the cleric. Beyond their names and looking like they came out of a Frank Franzetta painting (Baratus especially) they have effectively no more personality than Corvus or Doomguy, being essentially the Hexenguys. What matters is that they all play fairly differently.
All three classes use the same basic system: you start with a slot 1 weapon, gain two more that use blue and green mana respectively, and must find the parts that form the ultimate, fourth weapon that uses both mana pools. Armor is no longer the percentage-point system of Heretic and Doom but uses an Armor Class system, divided into four pieces: a helmet, mesh armor, a shield and an amulet of warding. (Fortunately AC is straightforward in this, no THAC0 nonsense: the higher the number the more damage your armor absorbs, though your AC will drop as you take damage.) How much your armor benefits you is class-dependent, with the mage getting less benefit (and starting at a lower AC) than the fighter, who gets the most, and the cleric, who's somewhere in the middle.) Like Heretic you get a pretty wide selection of inventory items, with some overlap like the Wings of Wrath.
Baratus is straightforward: he's tougher, hits harder, and is primarily melee focused. He starts off just punching everything in sight; his first new weapon is Timon's Axe, an enchanted axe that uses blue mana to chop enemies in half and is still useful even depowered. The Hammer of Retripution lets you throw magical flaming hammers at range (thus being the fighter's main ranged weapon) and is still useful as a melee weapon without green mana to power it. The Quietus is his ultimate weapon, a big sword that burns with green fire and sends out a wave of magical exploding swords, but paradoxically cannot be used in melee.
Daedolon, as a squishy mage, is the weakest physically but arguably the biggest damage-dealer by endgame. The sapphire wand is always useful, a ranged weapon with infinite ammo, its shots piercing enemies which makes it useful for taking down enemies pouring through a bottleneck. The blue mana-powered Frost Shards spell is essentially an ice shotgun that can freeze enemies. The green mana spell is the Arc of Death, an extremely powerful lightning bolt that ignores changes in terrain height and zaps enemies until either the spell fades or they explode, whichever comes first. The Bloodscourge is a goofy-looking mage staff that shoots homing fireballs.
Parias is the well-rounded character, a jack of all trades who nevertheless is kind of frustrating to play -- but that's not his fault, Hexen just has some design problems. (We'll get into that in a bit.) The Mace of Contrition is a standard mace with relatively long range but low damage; the Serpent Staff fires blue mana-powered projectiles that weave through the air, and also has a vampiric melee attack. The Firestorm is a decently powerful fire spell that runs on green mana. Lastly is the Wraithverge, a cross-shaped staff that's arguably the most powerful weapon in the game for its shooting out a bunch of angry ghosts that home in on enemies and rip them apart.
As I mentioned, the inventory has a lot of overlap with Heretic; while some items are identical in appearance and function, like the Quartz Flask and Chaos Device, others have been changed (the Morph Ovum is now the Porkalator, turning enemies into pigs) and there are some entirely new ones. The "flechette" (likely deriving its name from a World War 1-era French term for shrapnel weapons) is a vial of green fluid that behaves differently depending on which class uses it, with the mage's version being most similar to Heretic's Timebomb of the Ancients. The Dark Servant summons a Maulotaur who fights for you -- handy in the final battle! -- and Discs of Repulsion immediately repulse any enemy or projectile near you. Kraters of Might refill both mana bars completely and Dragonskin Bracers magically give you a portion of armor. The Boots of Speed do exactly what the name suggests, and the Banishment Device allows you to "begone, thot" enemies to somewhere else on the map, like a reverse Chaos Device.
While the bestiary isn't as anemic as Heretic's, it's still fairly limited; the scripting system tries to keep things interesting by tailoring enemy types and placements to your class, so you'll see more of a particular enemy type as one class than you would the others. As a group they fit the darker aesthetic of Hexen compared to the more cartoony Heretic, but they don't really seem to have a lot of diversity in roles. The ettin is the most common enemy, a two-headed weird mutant bastard in armor who tries to bop you with a mace and shares an idle noise with alien troopers from Duke Nukem 3D. Afrits fill a similar role to the fire gargoyles in Heretic, with the added wrinkle of sometimes being curled up in indestructable sleeping balls before waking up to attack you, and sometimes hiding in vases and stuff. Wendigos are exceedingly rare, only appearing in a couple of levels, one of which only if you're playing as the mage; they're pretty dangerous, though, with powerful frost attacks. Centaurs -- and their magic-tossing cousins the slaughtars -- are basically angry centaurs (which explains the name) who briefly put up their shields after taking damage, making them extremely tedious to fight, especially with melee. Stalkers are your classic reptilian/fish monsters, lurking in water only to pop out and slash you, with some even having the power to throw toxic fireballs at you. Fighting them is a pain in the ass as you have to wait for them to pop up. Dark bishops don't start showing up until about halfway through the game but they're roughly analogous to Disciples of D'Sparil, floating hooded assholes who unleash a spiralling stream of magic that slightly homes in on you, and they explode when they die. Chaos Serpents should look familiar to anyone who played Heretic, but here they're a lot weaker than D'Sparil's mount; there's a brown variety that spits poison at you instead of fire but is otherwise identical. The basic goon squad is rounded out by reivers, floating corpse torsos in ragged armor that throw powerful fireballs at you, only appearing in the final hub and a real pain in the ass.
Unlike Heretic, where boss enemies later join the standard ranks, Hexen's bosses remain bosses. The death wyvern, boss of the second hub (the first hub has no boss) is an annoying flying dragon that dominates a large cavernous lava pit with very little room to maneuver unless you use the Wings of Wrath. The Heresiarch is a big demonic monk bastard (who we first see at the end of Heretic) at the end of the third hub who casts powerful magic and takes quite a beating; you actually fight a second one at the end of the fourth hub. The fifth hub has three sub-bosses, the living evil corpses of the leaders of Cronus' different factions and former mentors to the player characters, thus each one looking like one of the player classes. All basically play like fighting a deathmatch bot, running about and spamming their respective slot 4 weapon at you; kill them all and you get to fight Korax, a weird bug-looking thing who throws tons of powerful magic at you and summons bad guys for you to wade through as part of a two-part arena fight.
Hexen is a lot more focused on atmosphere than its predecessor, with a greater focus on a gothic vibe. The art assets are significantly less washed out than Heretic, but on the other hand are less colorful as well, resorting mostly to browns and greys. Kevin Schilder returns to do music, striking a darker, moodier tone as opposed to Heretic's faster-paced tunes. Never is this emphasis on creating a dark fantasy atmosphere more apparent than in the very first level, "Winnowing Hall," a brief tutorial level intended to show off some of the new features like swinging doors and little details like a belltower you have to climb. It's dark, lightning flashes overhead, and the music is slow, horn-heavy and oppressive. It's great. The rest of the game operates on a hub structure, divided into five hubs with a central map with adjoining maps that you can move back and forth from. Unlike Quake II, which also was built on a hub structure, Raven sort of cheats it by using teleporters to zap you from map to map, so there's no real sense of progression except in rare cases (for example wandering into a dark tunnel only to fall off a ledge and into a sewer level.)

Hexen is a great game in principle, but it suffers from an idiosyncratic design that sort of takes away from its greatness -- it's the kind of game you'd keep on your hard drive for a decade but whenever you sit down to play it you remember what playing it is actually like and do something else. And pretty much all of the game's problems are immediately apparent from the second map, the official start of the first hub, "Seven Portals." Killing ettins and afrits in "Winnowing Hall" is all well and good but as the game starts to introduce more enemies to you, such as centaurs, it becomes clear that the combat is a slog; even as you gain your slot 2 weapon, fighting enemies is just a huge pain in the ass, especially once you meet centaurs who raise their shield after every hit they take, rendering them temporarily invincible. Like Heretic before it, it just feels like combat is an uphill battle, your weapons are all underpowered in the face of the enemy, lacking any real oomph, and there's a real lack of versatility, especially as the fighter. (This latter point is one of those things that you can expect to see in almost any class-based game, especially fantasy ones with a more old-school design ethos. You're pretty much weighing the pros and cons and deciding what's the most well-rounded class. While the three classes are all somewhat similar in stats, it becomes clear that the mage is powerful for most of the game whereas the fighter drops off after the first hub.)

Some people have tried to fix these issues; aside from RPG mods like Korax Mod, or weapon mods to give players a boost like Walpurgis or Tempered Arms, there's also Hexen 1.2, a relatively "pure" fanpatch (in the best cRPG tradition) that makes a lot of small tweaks, especially making the centaur significantly less of a pain to fight while still maintaining its overall conceit. Much like Wayfarer's Tome for Heretic, Hexen 1.2 is almost a must-have if you want to play Hexen again without remembering why you haven't played Hexen in years. Full disclosure: I did play through the game using it, as well as CronosPal to tweak the palette. Unfortunately, short of some drastic redesigns of the maps themselves you're only fixing half of the problem, but perhaps dealing with figuring out what the hell that switch you pulled just did will be more palatable if combat doesn't feel like such a chore.
I like Hexen a lot. I think its overall atmosphere is fantastic, and I appreciate how it tries to move away from the Doom clone trappings of its predecessor to instead try to get in touch with Raven's dungeon crawler roots. But it has some major design flaws that I think get in the way of it being a truly great game.


Hub One: Seven Portals

Winnowing Hall
Hexen isn't your typical Doom
clone, that much is obvious, but the rule about the first map needing
to make a good impression remains true. Brian Raffel introduces us to Hexen
with one of the most atmospheric openers ever crafted for a game: an
abandoned chapel of sorts with an inaccessible teleporter in the center,
and a bell tower in the distance behind a locked gate. Your job is to
find a way into the belltower to ring the bell, which will open up the
teleporter. It's a simple level, with not much in the way of interesting
combat encounters (save for using a fireball trap to soften up an ettin
ambush in the chapel) but what makes it work is the gloomy atmosphere,
the lightning strikes, and leaves blowing from dead trees. It's a
stunning gothic vibe that really encapsulates what Hexen is trying to go for, aesthetically.
Seven Portals
Unfortunately
while we might reasonably argue that "Winnowing Hall" makes for a good
MAP01, the first hub as a whole leaves a lot to be desired. "Seven
Portals" serves as the central location for the rest of the hub, and
though it's not particularly large or complex, it's the centerpiece of
what's ultimately kind of a weird, obtuse and frustrating puzzle that
kind of defines Hexen's gameplay. It looks nice enough,
but it's pretty symmetrical, as the main focus of the hub is the three
maps that the portals connect to.
Guardian of Ice
The
first of three elemental-themed maps that connect to "Seven Portals,"
"Guardian of Ice" is a frozen dungeon full of wendigos and traps. The
western wing of the map is a large ice cavern with a shifting floor,
part of which will eventually collapse into the abyss. I like being able
to turn on the lights by throwing a switch in the southeast chamber
(where you'll likely first enter this map from) but the coolest effect
-- pun not intended -- is opening up a couple of furnaces to melt an ice
column (which fills a basin with water) so you can reach the key
resting atop it.
Guardian of Fire
A
dark fire temple complex, the aesthetic here is mostly a lot of black
and red, appropriately enough. More cool environmental effects here, the
opening room collapsing and filling with lava, and the bridge in the
northeast also collapsing (but you don't need to jump across the
remains, there's a ledge alongside the chamber you can use instead.) The
metal room to the west will present one of the tougher fights in the
hub.
Guardian of Steel
Unquestionably
the most annoying level in the hub, it's a big metal dungeon, roughly
symmetrical. You'll likely meet your first centaurs here and they are a
huge pain to deal with. The whole thing basically hinges on using
switches to toggle a large metal wall that blocks one path or another so
you can throw the switches beyond, said switches having effects back on
"Seven Portals." The chambers full of moving metal blocks is a lethal
death trap that will also just plain make you go deaf, but it's a lot
safer than the wendigo ambush you teleport into in the south.
Bright Crucible
The
hub's secret level -- accessed by solving an optional series of puzzles
-- is basically one big semi-symmetrical battlefield. There's a lot of
Chaos Serpents here to make your life hell. Your job is to find the big
red gem on one side and place it in the receptacle on the other. It's a
simple enough task, save for the hordes of enemies that infest the
level, mostly Chaos Serpents and centaurs. It's as hectic as Hexen gets, especially the ambush in the plaza to the north.
Hub 2: Shadow Wood

Shadow Wood
After
the weird elemental trial theme of the first hub, the second hub is a
more naturalistic dealie that feels closer to an actual RPG-like
setting. The focus of the map is an abandoned temple not far from the
starting point; I like the ruined Romanesque vibe as you climb the steps
to the temple proper. Within the temple is a door and six recesses in
the walls on either side. Your job is to visit the other parts of the
hub and throw six corresponding switches. To do that you have to find
three keys, each one of which is themed after a map and is used to open
new areas in the other two, in sort of Metroid-style. Once
you've done that, you come back here to reach the exit. Also on this
map is a big tower in the middle of a flooded area.
Darkmere
This is probably my favorite map in the hub, as it's the most interesting, visually and gameplay-wise. A gloomy, fog-choked swamp, you'll come across abandoned houses here and there but the centerpiece is an abandoned castle on the eastern edge of the map. It's also the only map in the hub that features a unique key and door, with the castle's tower keep locked and the key in a trap room further into the complex. I like that you can temporarily raise the drawbridge, but honestly the coolest place is the wave room to the west.

Caves of Circe
A
sprawling, dark, narrow maze of caverns with lots of dead ends and
one-way drop-offs, "Caves of Circe" is, broadly speaking, an annoying
level with little to offer except a whole mess of Chaos Serpents.
Careful examination of the map is required here to find your way,
because a couple of times you'll have to drop down a hole in the corner
of one room or another. I wish there had been more to this level,
because I love the name.
Wastelands
Like
"Caves of Circe," but mostly aboveground, "Wastelands" is a barren
series of canyons and tunnels. Your biggest threat here may actually be
the spikes that rest in the ground. You might not spot them at first, as
your only hint of their presence is a little pile of dirt in the
ground, but they're lethal against anything that happens to be standing
over them when they pop out. It's more interesting than "Caves of Circe"
if only because there's a couple of setpieces here, namely the big
temple to the north, a swampy area nearby and a locked teleporter to the
south dumps you in an otherwise inaccessible lava cave in the center of
the map filled with afrits. Not as atmospheric as "Darkmere" but still
an okay map.
Sacred Grove
If
you climb the rocks in the opening area of "Shadow Wood" after you've
thrown all six switches, you'll find a portal to this map, which is a
very simple, small map: a large, squarish room with a switch in the
middle. There's a few ettins in here, which you should have no problem
defeating, though you should hurry up as after about a minute more will
teleport in every ten seconds. If there's more than twenty of the
two-headed bastards active at once, the exit portal will permanently
seal and Chaos Serpents will storm the area until you are dead. It's a
fun idea that you might actually not even know about, as the game
doesn't tell you it's happening, but the encounter is so low-key for the
stakes that you'll likely clear the room well before the initial timer
runs out.
Hypostyle
The final map of the hub is a boss level that first requires you to throw switches in four rooms on all sides of the central chamber; you'll then be able to access a large cavern to the south. No matter which class you're playing, the wyvern encounter is an enormous pain in the ass; even once you've gotten the Wings of Wrath, you're still going to have to chase him down. Another example of Hexen's idiosyncratic design philosophy.
Hub Three: Heresiarch's Seminary

Heresiarch's Seminary
The
map numbering goes a little haywire with the third hub, "Heresiarch's
Seminary," jumping from MAP12 to MAP27 in a single bound, but in
practice it doesn't really matter. "Heresiarch's Seminary," the map, is a
gloomy cathedral type thing that's pretty straight forward, except for a
pair of side areas that are optional and you might not actually figure
out how to access, but you can definitely see the pool area through a
barred window. Progress on this map consists of two parts: first
gathering gems called "planets," and placing them on the chart on the
wall at the southern end of the main hall, and then going to a trio of
chapels for a more traditional switch puzzle. When you're all done, the
titular Heresiarch shows up to see what all the fuss is, and while he's
not annoying like the wyvern, he's still a tough fight. You're also
introduced to Dark Bishops in this area, who float around like Disciples
of D'Sparil, but unleash a spiral of magic missiles that vaguely arc in
your direction.
Orchard of Lamentations
A
simple, naturalistic map that's made up of three large rooms. The
northern room is a series of tiers, the central room is a large garden
area with some stairs leading down in the center. The southern room is a
large trap where the floor will lower, allowing access, but quickly
raise back up again, squishing anyone caught outside of the safe zones.
Your task is to find the gems, and frankly it's not a complex job --
even the southern room is easy as long as you mind your placing and take
advantage of the fact that the squishing works on enemies too.
Silent Refectory
You're
dumped in a cramped crate maze. From here you can find entrances to the
dining hall, a tower-like room, and an area with a pool and teleporter.
The place is crawling with Dark Bishops, who struggle with the cramped
conditions but are dangerous up close. The dining hall is probably the
biggest threat as you'll first see it from what appears to be a kitchen,
with heavy fire coming in through the window from the dining room
proper. The important thing is that whatever you do, make sure you sweep
through the map again to see what opened -- because the game doesn't
tell you.
Wolf Chapel
A
sprawling chapel complex, you probably won't see most of it your first
visit here beyond the colonnade hallway, but as you progress in the
other maps more of this one will open up. Lots of side rooms full of
enemies, but the centerpiece is the large chapel in the north full of
enemies, spawning in a horde of Dark Bishops once you've done what you
came here to do. Fun level, cool atmosphere. I like the ettins crashing
in through the ceiling.
Dragon Chapel
A
single large chamber dominates the map with a number of side rooms and
hallways for a mostly symmetric layout. The room is full of Dark
Bishops, ettins and slaughtaurs, with swarms of afrits for spice. Your
job here is pretty straightforward -- just clear the area and throw the
switches. Spinning stone columns block your way until you've opened the
path via the other chapels. It's a pretty hectic map, all told.
Griffin Chapel
Now
this is more like it. It's still a small-ish level, but it presents a
series of traps for the player, the big one being the moving walls in
the northwest. Chaos Serpents are everywhere and behind every secret
door, but at this point you should be well-versed in dealing with them.
The northern chasm is notable for pretty much requiring you to make a
leap of faith to spawn invisible platforms that you can walk on, but
watch out for the horde of afrits in the fire pits below. Fun map.
Deathwind Chapel
This one becomes accessible after you kill the Heresiarch. Unlike the other secret levels this one doesn't have any special gimmick nor is it necessary for a later secret, but it's a fun time, a chamber complex full of enemies that plays a little more like Heretic than anything else. You'll have to be willing to hot-foot it in the northwest to proceed, but it's less stressful than the spinning slicers that occupy the eastern room. Your reward once you clear out all the bullshit is a Krater of Might, which you'll probably want after fighting the Heresiarch.
Hub Four: Castle of Grief

Castle of Grief
An
incredibly hectic map, the opening map for this hub is surprisingly not
terribly central to the overall structure of the hub. It has its own
internal puzzle in the form of finding gears scattered around the castle
and placing them into gearboxes on the southern end of the map, but
once you gain access to the Gibbet the map ceases to be relevant. But
there are a lot of enemies and you'll likely be pretty busy clearing them out.
Forsaken Outpost
This
one feels a little more like something from the second hub; it's an
aptly-named little fortress past some caves. It's pretty flat,
geographically-speaking, but nice and desolate. The northern end has
repeated waves of enemies that pop up as you throw each switch in the
side rooms. I like the little fountain.
Desolate Gardens
If
you've been diligent about finding the first two secret levels you'll
be able to access this one, which is as small as it is irritatingly
unstraightforward. The initial part involves throwing switches as they
pop up from the ground; as you throw switches, more of the map will open
up, allowing you to explore and find the pieces of your ultimate
weapon, if you haven't found them yet. Fun surprise flood trap in the
eastern end.
Gibbet
The
core of the hub is a pretty typical castle interior type deal, the
central chamber flanked by four additional rooms in the cardinal
directions. From the bedroom and library to the south, to the chapel to
the east, to the art gallery(?) in the north, and finally the throne
room in the west where the hub concludes, you'll be here a lot, each
area having its own purpose. Your main task is to find elsewhere in the
hub a pair of books to slot into a shelf in the library and the missing
head of a statue in the chapel. Ultimately you'll open the cage with the
axe key, letting you into the throne room with a pretty big fight with a
bunch of trash mobs and another Heresiarch.
Effluvium
The
obligatory sewer level is cramped, dark and creepy, with lots of
stalkers lurking in the fetid waters. Little by little you'll open up
more of the level, but it's still just a dimly-lit labyrinth full of
danger. Lots of secret passages for you to find -- you just have to know
where to look.
Dungeons
Like "Effluvium," this is a cramped, dark map, though the eastern end is a little more open. There are a lot of bad guys in this one, and eventually a whole horde of ettins will show up in the main room, but so long as you're careful you should be okay. More annoying is the puzzle in the wheel-and-spoke room to the south, as you'll have to hit the button nearby repeatedly to open the cells.
Hub Five: Necropolis

Necropolis
The
final hub is pretty short, with no serious puzzling -- instead, you'll
be visiting three tombs, each belonging to the leaders of the three
factions that rule the world of Cronos. The epyonmous map from which the
hub draws its name is pretty small -- a gloomy, dark graveyard full of
reivers, nasty floating corpses that throw fireballs at you. It's
actually pretty hectic as they'll just keep coming until their
reinforces run out. There are three tombs to find here, but if you want
to stock up you'd better visit the secret level first -- it closes when
you step foot in one of the tombs.
Zedek's Tomb
The
tomb of Zedek, who leads the corrupted armies of Cronos, is a
relatively straightforward affair. It starts off with a single lengthy
hallway but the main event is dealing with the ring of side chambers
full of ettins and centaurs. Generally not very taxing, though I do like
the lighting in the puzzle room before the boss.
Menelkir's Tomb
The
archmage awaits you in the center of a ring of chambers. The little
rooms are simple matching puzzles to progress; the big rooms reflect the
elements and also have a matching puzzle that might not be terribly
obvious right away. Menelkir himself is a pushover so long as you don't
let him fire off his Bloodscourge.
Traductus' Tomb
The
tomb of the leader of the church is pretty hectic, with lots of chaos
serpents in the starting cave and hordes of dark bishops further in.
Traductus is extremely dangerous with that Wraithverge of his, but if
you're quick you can run around the corners to lose the ghosts he
unleashes, and if you're quicker you can use Discs of Repulsion to
bounce the ghosts right back to him. Hexen isn't terribly like Doom typically but it did feel like it a bit during that bishop ambush in the western staircase room.
Vivarium
An
extremely simple encounter, "Vivarium" is just one big room with some
stuff in it for you to grab. Four big crushers await to punish the slow,
and monsters ambush you pretty much from the getgo. What's interesting
about this map is the monsters are different depending on your class,
intended to more or less mirror your class' weapons -- for example, as
the mage, wendigos are a reference to the mage's frost spell.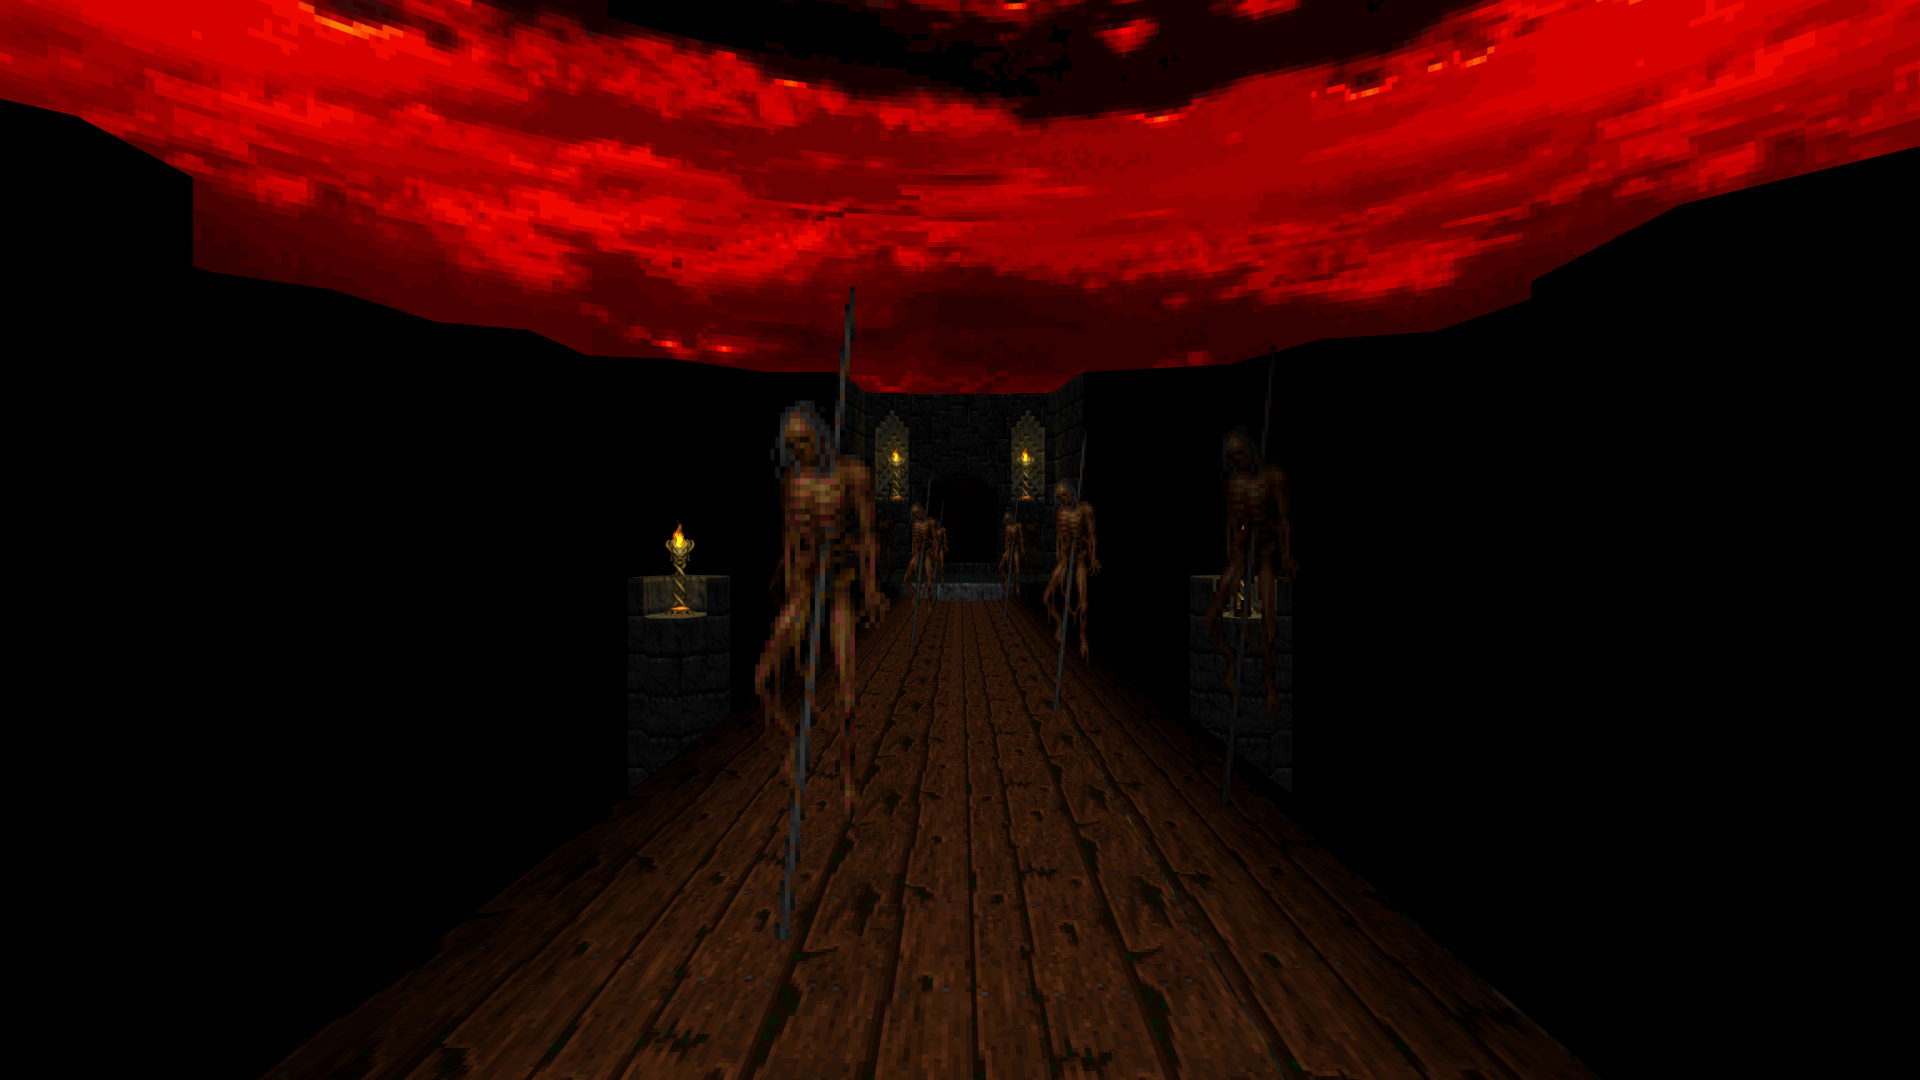
Dark Crucible
The very last level of Hexen is an arena split in half. Korax is a big ugly bug-looking thing (very unlike D'Sparil from Heretic) who throws all manner of magic projectiles at you and teleports around. He'll also summon a bunch of goons to do his dirty work; I hope you've been saving up your Kraters of Might because it's going to take a lot of mana to bring Korax and company down.
-June<3
Part of a series on Raven's fantasy games
| Heretic | Shadow of the Serpent Riders |
| Hexen: Beyond Heretic | Deathkings of the Dark Citadel |
| Hexen II | Portal of Praevus |
| Heretic II | |
| Shadowcaster | |
No comments:
Post a Comment